Welcome to the second part of my blog series, where I continue to document my journey in building an intelligent hexapod robot. In the previous blog post, I shared my project ideation and the process of 3D printing the robot’s parts. If you missed it, you can find it here.
Continuing from where we left off, once I had all the mechanical parts and screws, I proceeded with the assembly process. I acquired servo motors, specifically 35KG 180-degree movement servos, to act as the joint mechanisms. These servos allow me to control the precise position of each leg through a Pulse-Width-Modulation signal. Each leg consists of three motors: one for the shoulder, one for the elbow, and one for the wrist. This configuration enables the robot to navigate various terrains and perform a wide range of movements. In total, the model requires 18 of these servo motors. To control the servos, I used a Raspberry Pi Pico RP2040 board, which serves as the servo driver chip. I opted for a board from Pimoroni.
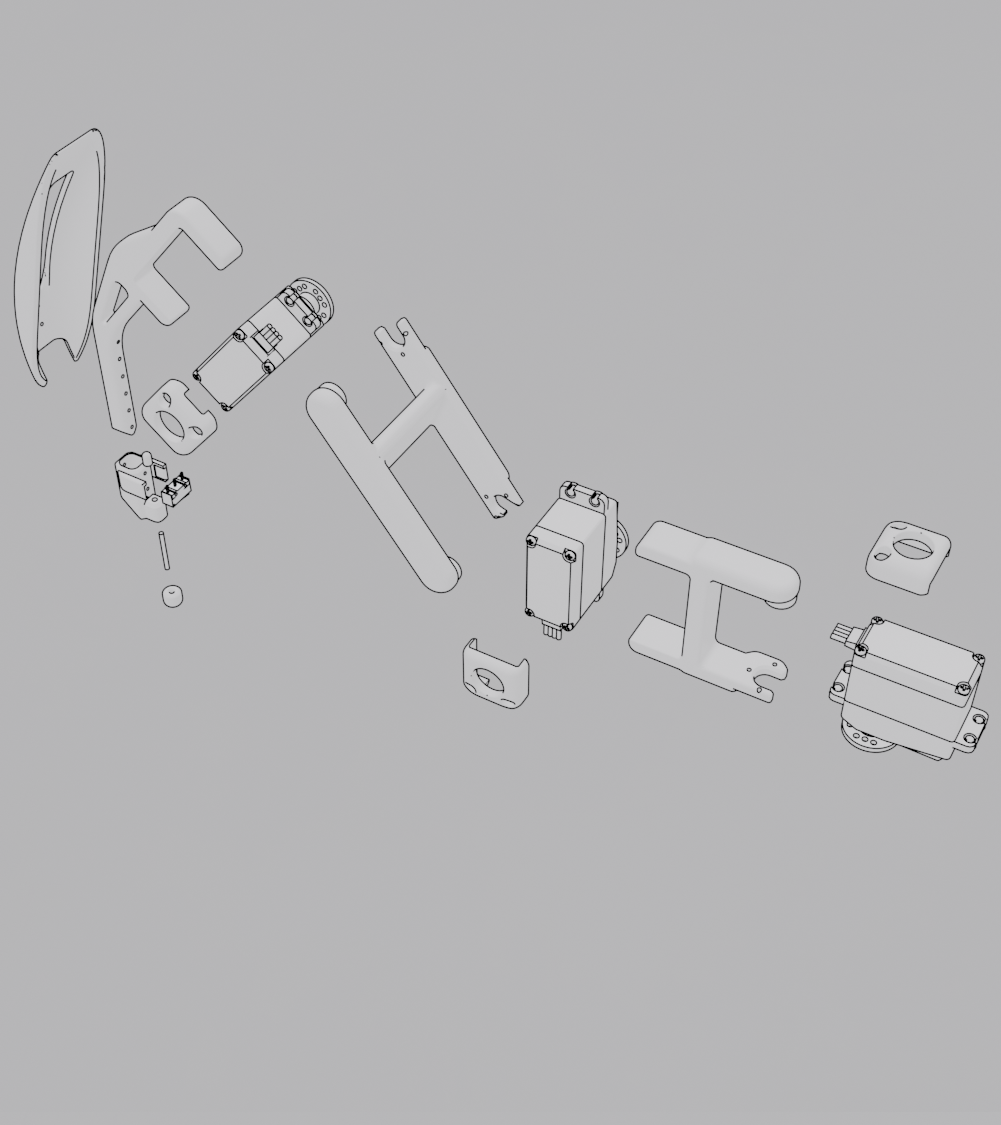
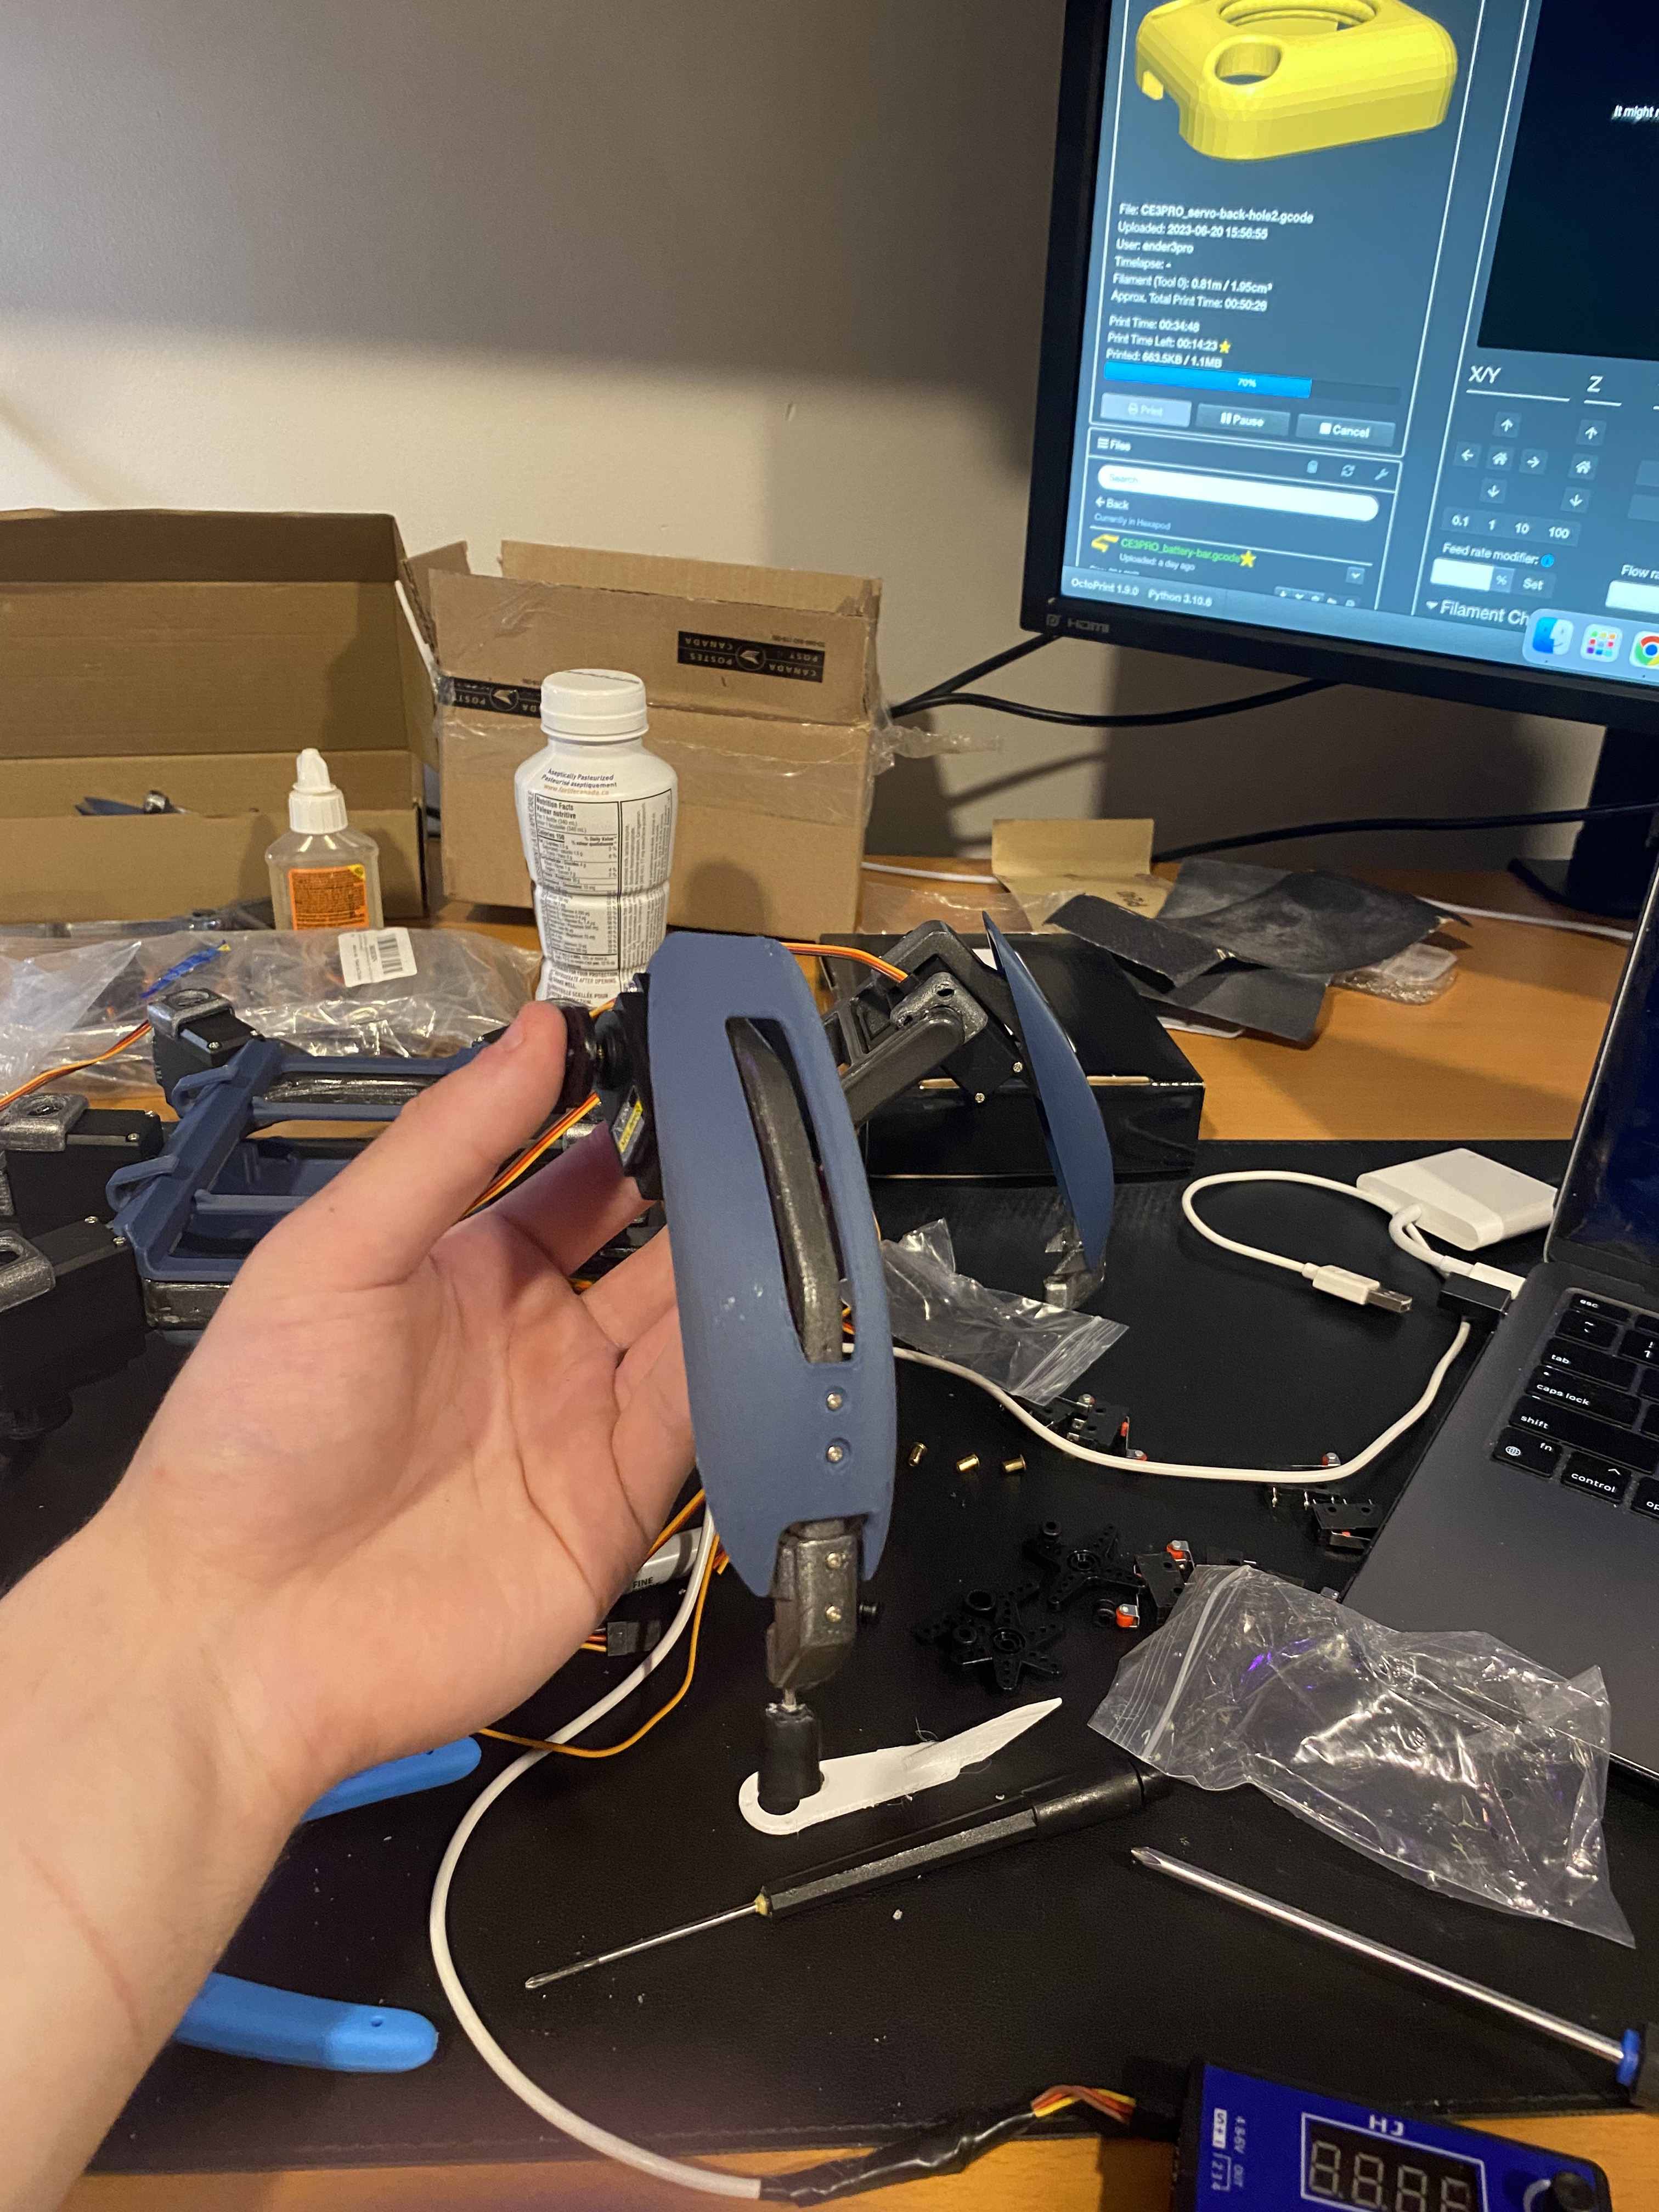
Figure 1: Hexapod mechanical leg schematic and assembly
To power the hexapod, I purchased a 7.4V rechargeable lithium battery, which is connected to a 5V relay module. The relay module is then connected to a kill switch and the main RP2040 board (see electronic diagram below). In addition, I incorporated a combination of limit switches and 3D printed parts to provide sensors below each foot. These sensors will be useful for implementing reward systems in a reinforcement learning model.

Figure 2: Electronic diagram
The assembly process was time-consuming due to the use of adhesives and the need for soldering multiple wires and components. Each leg required 12 individual wires responsible for the signal and power of the motors and foot sensors. It was crucial to ensure accurate connections and avoid any wiring issues.
Throughout the assembly process, I encountered a major complication – one defective motor. However, rather than delaying the project, I decided to continue with the assembly, leaving one leg incomplete. I have already ordered a replacement motor, which is expected to arrive in two weeks.
Once the assembly was (semi) complete, I conducted some initial testing to ensure the motors were functioning correctly. I ran a code snippet using the RP2040 board connected directly to my MacBook and Thonny IDE, a micro Python interpreter. The code snippet involved moving the servo motors in a sine sweep pattern to observe their accuracy and connectivity.
import time
import math
from servo import Servo, servo2040
from machine import Pin

power_pin = Pin(26, mode=Pin.OUT, value=1)

# Right Front Leg
rf1 = Servo(servo2040.SERVO_18)
rf2 = Servo(servo2040.SERVO_17)
rf3 = Servo(servo2040.SERVO_16)
# Right Middle Leg
rm1 = Servo(servo2040.SERVO_10)
rm2 = Servo(servo2040.SERVO_11)
rm3 = Servo(servo2040.SERVO_12)
# Right Back Leg
rb1 = Servo(servo2040.SERVO_1)
rb2 = Servo(servo2040.SERVO_2)
rb3 = Servo(servo2040.SERVO_3)
# Left Middle Leg
lm1 = Servo(servo2040.SERVO_7)
lm2 = Servo(servo2040.SERVO_8)
lm3 = Servo(servo2040.SERVO_9)
# Left Back Leg
lb1 = Servo(servo2040.SERVO_4)
lb2 = Servo(servo2040.SERVO_5)
lb3 = Servo(servo2040.SERVO_6)


# Enable the servo (this puts it at the middle)
rf1.enable()
rf2.enable()
rf3.enable()
rm1.enable()
rm2.enable()
rm3.enable()
rb1.enable()
rb2.enable()
rb3.enable()
lm1.enable()
lm2.enable()
lm3.enable()
lb1.enable()
lb2.enable()
lb3.enable()
time.sleep(2)


SWEEPS = 1             # How many sweeps of the servo to perform
SWEEP_EXTENT = 45.0     # How far from zero to move the servo when sweeping

# Do a sine sweep
for j in range(SWEEPS):
    for i in range(360):
        rf1.value(math.sin(math.radians(i)) * SWEEP_EXTENT)
        rf2.value(math.sin(math.radians(i)) * SWEEP_EXTENT)
        rf3.value(math.sin(math.radians(i)) * SWEEP_EXTENT)

        rm1.value(-math.sin(math.radians(i)) * SWEEP_EXTENT)
        rm2.value(-math.sin(math.radians(i)) * SWEEP_EXTENT)
        #rm3.value(math.sin(math.radians(i)) * SWEEP_EXTENT)

        rb1.value(-math.sin(math.radians(i)) * SWEEP_EXTENT)
        rb2.value(-math.sin(math.radians(i)) * SWEEP_EXTENT)
        rb3.value(-math.sin(math.radians(i)) * SWEEP_EXTENT)

        lm1.value(math.sin(math.radians(i)) * SWEEP_EXTENT)
        lm2.value(math.sin(math.radians(i)) * SWEEP_EXTENT)
        #lm3.value(-math.sin(math.radians(i)) * SWEEP_EXTENT)

        lb1.value(math.sin(math.radians(i)) * SWEEP_EXTENT)
        lb2.value(math.sin(math.radians(i)) * SWEEP_EXTENT)
        lb3.value(math.sin(math.radians(i)) * SWEEP_EXTENT)

        time.sleep(0.02)

# Disable the servo
rf1.disable()
rf2.disable()
rf3.disable()
rm1.disable()
rm2.disable()
rm3.disable()
rb1.disable()
rb2.disable()
rb3.disable()
lm1.disable()
lm2.disable()
lm3.disable()
lb1.disable()
lb2.disable()
lb3.disable()
The result was fascinating to see, although the movement was a bit shaky. I believe this shakiness can be addressed by refining the PWM timings or potentially using more powerful motors capable of handling the required weight. To further develop the project, I plan to import the hexapod model into a robotics simulator such as Unity ML Agents, Unity Robotics, or Gazebo. This will allow me to train the model virtually using reinforcement learning techniques. Additionally, I need to decide on the main board that will handle the inference model calculations and explore the possibility of integrating computer vision for dynamic terrain movement and self-charging capabilities.
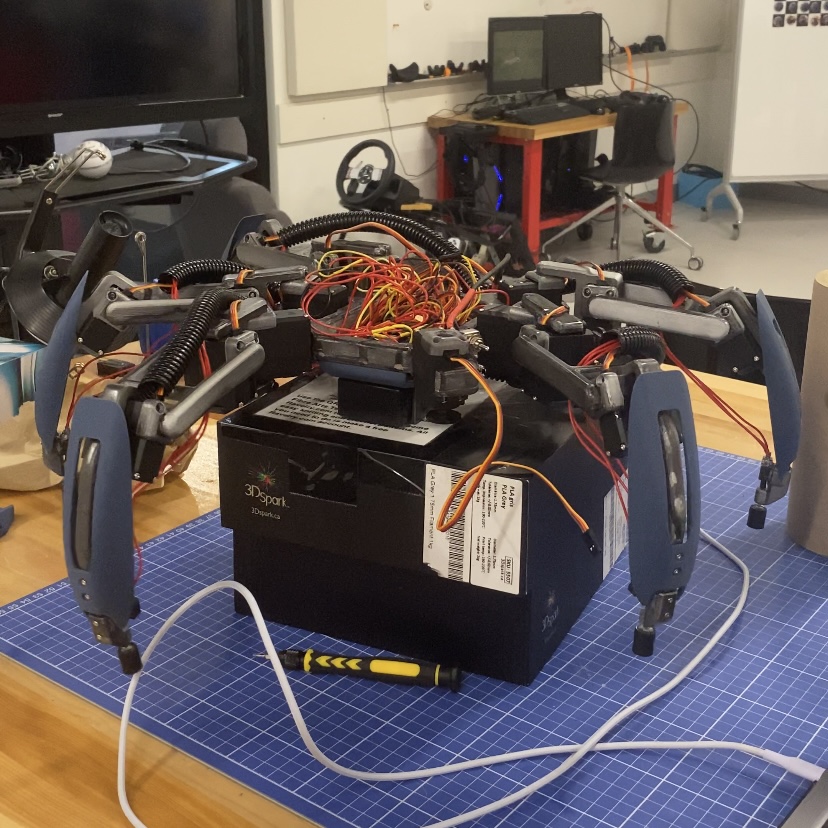
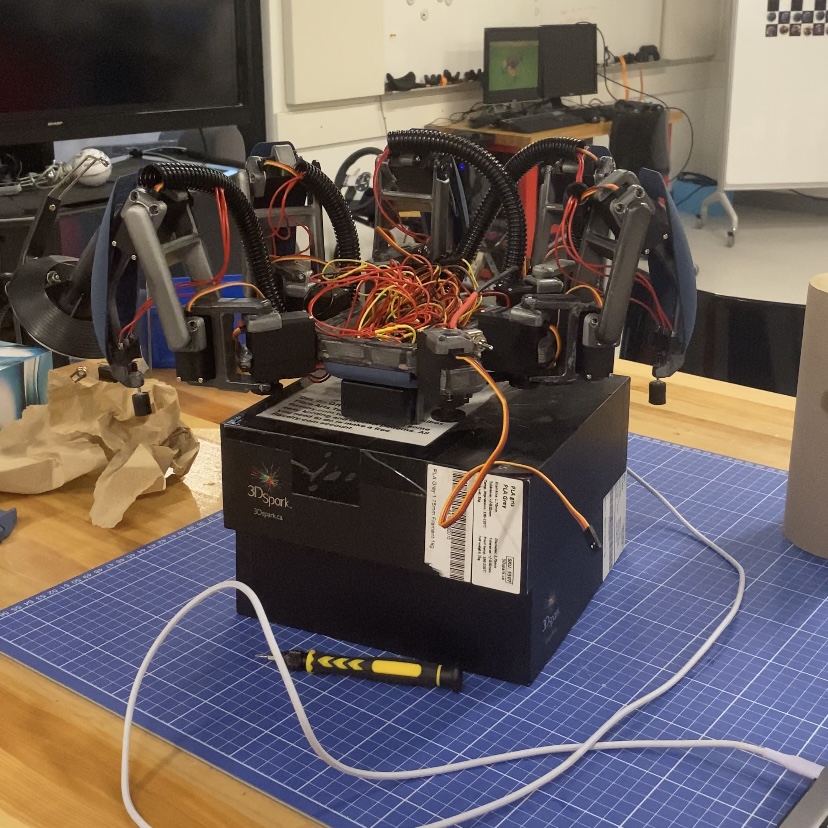
Figure 3: Initial hexapod movement
Stay tuned for the upcoming third part of this blog series, where I will delve deeper into the software integration and explore the implementation of intelligent systems and reinforcement learning algorithms. Together, let’s continue unraveling the fascinating journey toward achieving true intelligence through the fusion of hardware and software.
Don’t forget to subscribe to my newsletter or follow me on LinkedIn for the latest updates on this project and other exciting developments.


Leave a comment